Showing posts with label house. Show all posts

Wednesday, November 5, 2014

House Renovation - Bathrooms Before And After

I think today I’ll do a bathroom tour.  Our house has five, FIVE, bathrooms.  And before you go thinking how luxurious my life must be, I have to remind you that all FIVE bathrooms need to be cleaned.  That’s 7 sinks, 5 toilets, 3 tubs, 4 showers, and all that tile flooring with the associated GROUT that my children have free rein to pee in, on, and around, as well as dropping and spitting toothpaste, mouthwash, boogers, and other worse things.  I despise cleaning tile flooring.  That is, I despise cleaning grout. But only slightly less, I detest scrubbing bathtubs and showers.  Toilets I don’t mind.  I know that seems weird.  But it’s the grout, the mildew in the corners of the grout, the unreachable spots in the tubs and showers that give me fits.  But enough about this sordid aspect of the topic.  Suffice it to say that cleaning five bathrooms blows.  Now...let’s move on to the transformations!

Bathroom 1:  I’ll start with the basement bath because it was so shockingly horrible before, and so lovely now.  We nick-named it “The StarTrek bathroom” when we bought the house because of the weird rounded shower enclosure and nooks.  It reminded us of something from the original 1960’s Star Trek TV show set.  


But we tore out every speck of that bathroom.  It has now made a successful leap into the 21st century. And I give Big Daddy full credit for this one.  He picked out everything himself, from the tiles to the layout to the furnishings.  He wanted a spa feel since this is the guest bath, being closest to the guest bathroom.  And it turned out absolutely stunning, I think. 


Here, for dramatic effect, is the before and after shot...


 What do you think?


Friday, September 5, 2014

Before and After - The Family Room!

So last week I spotlighted the libarry/music room (i.e. formal living room).  And right next door is the family room.  It's time to see how that turned out....


You may remember that when we first bought the house, the formal living room was only barely separated (by one pillar) from the room next to it.  They were using that room as a formal dining room.  But since Big Daddy and I are very informal people, we quickly decided to wall in that space to become our new family room, and to make the adjoining room (formerly their family room) into our dining room.  So first we had to tear down the wall separating their family and dining rooms and put one up to separate the formal living room with our new family room....

Before the wall went up...

After the wall went up...


We built in these half walls to give the new family room some definition from the hallway...


Next we tore out 2/3 of the other wall...


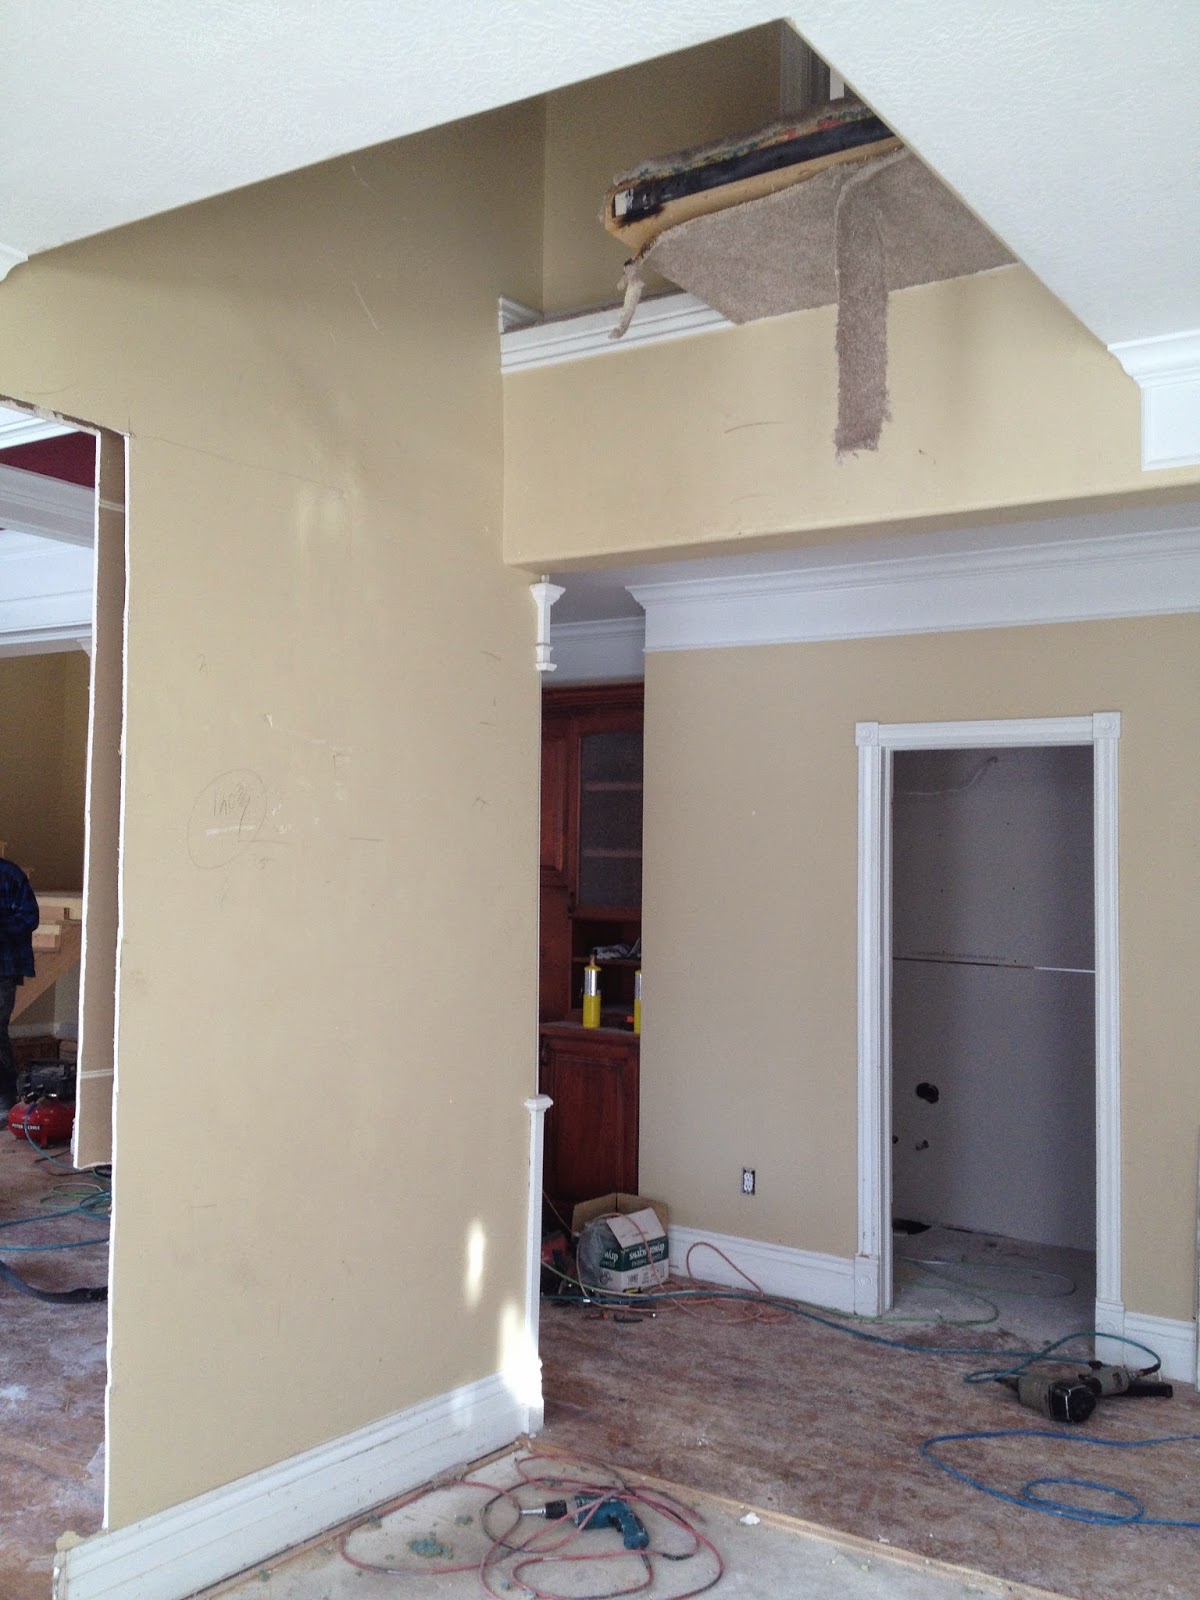
Originally we left part of the wall up.  That gaping hole in the ceiling is where the spiral staircase came down from the 2nd floor hallway.  We planned on rebuilding it, but we didn't know if we'd need part of the wall for support or not...

Eventually, though, we decided that if we did need it we might as well build that wall fresh, so we tore the whole thing down.

Once that wall came down, and the new wall went up at the other side, we looked at that space and thought, "That is going to be the world's smallest family room!  And how much sense does it make to have a tiny family room in a nice spacious house?  It's the heart of the home.  And, like this, it wouldn't even fit our 3-person sofa."  So......

BAM!  We knocked that wall down and bumped the whole room out another 10 feet.


The three french doors (2 windows and a door actually) at the back of the room became a large picture window (repurposed from the front of the house).  And the room began to look like it might be a good size.  But it's so hard to tell with 2x4's and particle board!  We hoped the scale would work out in the end.

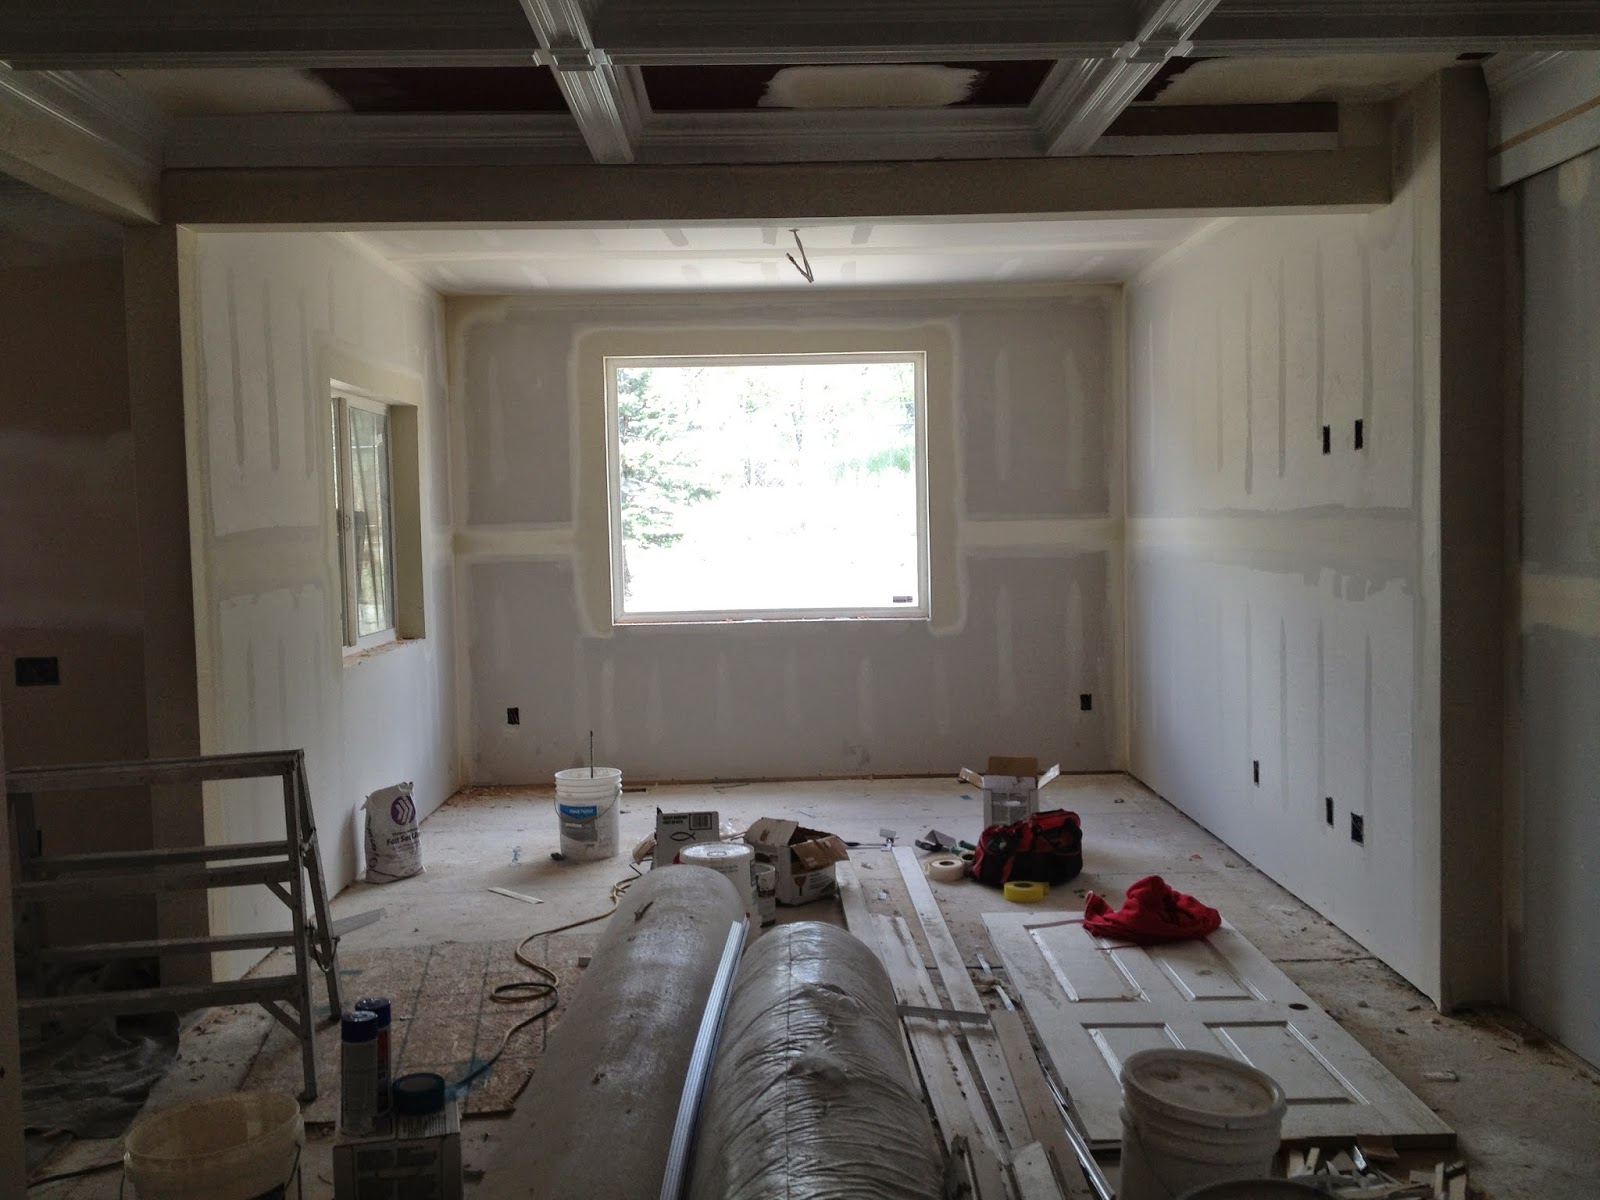
The action slowed down for a couple of months and it seemed like forever before the roof got put on.  Every time it rained or snowed (this was Jan-April) I rushed over to make sure there were tarps up and nothing was leaking into the house and onto our freshly installed hardwood floors!  And then suddenly one day there was a roof, four walls, windows, and drywall.  Then the new HVAC got piped in, insulation was sprayed in, electrical was installed, and finally it looked more like this:


 Next we had to figure out what to do about the beautiful coffered ceiling from the old dining room.  It was gorgeous (minus the burgundy paint, of course). and we wanted to carry it through to the new addition.  But that trim had been custom made, 18 years previous, and we had little hope of finding the exact same trim to copy on the other side.  So we thought about ripping it down to create continuity.  But lucky for us, our contractor had a fantastic finish work guy who came over and said he could match it exactly.  So after new support beams were put in place to carry the load of the 2nd story, the coffered ceiling was put in.  And it looked PERFECT.  I painted it the same shade of blue as the kitchen (Copen Blue by Sherwin Williams), and voilĂ !


The rest of the room got painted the same Siberia color as most of the main floor.  We added a super plush grey carpet (SmartStrand Silk by Mohawk. It feels like rabbit fur it so soft!) so the kids would have a soft place to roll around and lounge.

The last touch was remodeling the columns and trimming the half walls.  Because the old columns had to be cut into to add/remove walls, and because they were more ornate than our taste, we had our trim guy wrap the old ones with a more simple, Craftsman style.  I love how they turned out.


So here are the final before and afters.  Sadly, I didn't take a single picture of the family room before we started working on it from straight on.  So you really have to adjust your perspective to see the transformation.  (Pretend you're standing at the left of the top picture looking towards the 3 doors.)


 (The wall to the right was the open space before, and the little jog in the wall on the right is where the room used to end.  Straight ahead there were 3 large windows/doors.  And to the left, the open space used to be a wall.  Can you picture it now?)

This is the view from the dining room and kitchen...

Before...


After...


This is the view from the far side of the family room looking back toward the hallway.

Before...
After...


And this is the straight on view of the family room.


Mostly I used bright red and aqua for my accent colors.  I love that combination!  I had the pillow covers made on etsy because sewing a square is way over my head.  I hope you like how it turned out.

Leave a comment when you stop by!

Next up: The Dining Room!

.


Wednesday, August 27, 2014

Before And After - Living Room Renovation

The room that first won me over to this house, the one that really took my breath away (despite how nasty the house was as a whole) was this room--the formal living room.  The pillars give it a regal look.  The height of the room was amazing.  The wood floors, though in need of repair and new stain, made it feel vast and expensive. Huge windows flooded the massive room with warm light and turned the oak floors into a puddle of gold.  And the fireplace....well, I'm not really into mauve faux marble, but the mantle was lovely.  I could see its potential as a real showpiece.


The only problem with this room, as it stood, was that it was a big formal living space attached to a less-formal living space (our future family room).  Who needs two living areas joined together?  How would we define them and make each it's own purposeful space?  We decided to wall in the family room and make the formal living room (a space I find ridiculous in this day and age) into a music room/library.


The construction began almost immediately...

...


And soon there was a wall.  Then it was painted. We chose "Siberia" by Kwal, a warm grayish-beige color. Then the pillars were redone in a more simple craftsman style (the updated style was actually wrapped around the old one), and voila!  The new music room/library!


Well, sort of.  We haven't bought a piano yet.  And we haven't put up the wall-to-wall bookshelves yet.  Right now it's a holding tank for all the furniture that doesn't have a home.  But at least the space is defined. And the fireplace looks amazing now!  And someday soon we will have that library and (hopefully a baby grand) piano.


The Fireplace


Herringbone marble was used for the new tile surround.  Carerra was a little too grey and cold for me, so I picked this warmer tan and beige and cream colored herringbone tile called "crema marfil."   It came in pre-made sheets and was a little less expensive than the Carerra.


 The new hearth was made of slabs of the same gorgeous Silestone ("Tigris Sand") that we used on the kitchen counters, so it tied in beautifully with the other fireplace just off the kitchen.  


We kept the mantle as it was and will have gas installed in the fireplace at some point.  I think it turned out lovely!

I'm not sure when we'll finish decorating this space as the music room/library, but I'll post some more pictures when we do.


Tuesday, April 8, 2014

Tile!!

I hate grout.  Hate it with a burning passion.  If you've ever had tile, you'll know that grout is a complete nightmare.  It is always dirty, so hard to clean, rough, stained, traps dust and spills.....I'm not even close to being a germ-o-phobe, but the thought of what is down in those cracks gives me the heebie-jeebies.  And then there's how it looks.  Even though I steam clean (AKA sterilize) my floor regularly, nothing seems to make it look better.  I've tried everything!  Bleach, Lemi-Shine, even scrubbing it with Comet and a toothbrush.  But it still always looks grimy and stained.   Tile is also cold.  And really hard underfoot.  So when we bought Little Pink House III and began renovations, I was pretty determined not to have any tile in it.  But, the alternatives were wood (not good in wet areas like bathrooms) and laminate flooring (ew!).  So I decided to take another look into the tile option.

The upside of tile is that it can be really beautiful.  So the appearance of the tile itself wasn't an issue.  But that grout!  So when I went to tile stores, I asked around:  What products were there that could make tile more user friendly?  Less rough?  Less prone to staining?  Easier to clean?   I got several answers.  The first was, make your tile joints a lot smaller.  Back in the day, people used these giant  1/4" grout joints.  But for almost all tile, you can get away with 1/8" or sometimes even 1/16".  Done!  Then, as for grout products, I was told:  1) Epoxy.  This is a combination of grout and epoxy.  It has a more smooth plastic feel.  It doesn't stain at all so it stays looking nice and it's easy to clean.  BUT it was a nightmare to work with, I was told.  And at almost $200 a bucket, doing 5 bathrooms, a laundry room, and a mud room was out of the question.  2) Polyurethane grout.  Same idea.  Made of polymers mixed with grout.  Smooth, stain free.  But about half the price.  Still, at $100 a bucket I was looking at a fortune just for grout.  3) Finally, on the advice of a very knowledgeable tile guy at my tile store, we found that mixing the sealant in WITH the grout, and some other special additive, made the grout really even in color without the usual staining caused by sealing it, and it responds way better to cleaning.  I had my doubts.  I still do.  I still think I may end up tearing my hair out over this amount of tile I just put in.  But he seemed pretty sure I'd like the result so....I went tile shopping.

For the master bathroom tile, Big Daddy and I chose a cream colored, shiny modern tile. 13x35, so pretty big slabs.  It has a sort of bamboo-ish stripe pattern to it.  I love it!  It will go on the bottom half of the shower and the tub skirt.


We paired that with 3x6 sea glass subway tile for the top half of the shower, the tub backsplash and the vanity backsplash, 1x1" sea glass mosaic tile for the shower floor, and Big Daddy chose a dark brown slightly linen striped 12x24" for the floor.


The tile in the master bath is all finished.  Do you want a sneak peak??  (The walls are still not painted and the floor is dusty, so obviously it'll look better than this when it's all finished and clean.)


Pippa's bathroom upstairs got a retro look with black and white hex tile.  I need to pick out a fun, whimsical towel/shower curtain design that won't be too busy for this polka dot look.  Any ideas?


Daphne and Beck's bathroom got a very modern 24x24" beige linen tile.  It was on sale for $2/square foot! And because it was such a deal, we splurged and bought this absolutely gorgeous aqua hex tile for the backsplash.


The upstairs laundry I chose black and white checkered 12x12" tile just like in my laundry currently.  Only it turns out that the one I bought is SUPER smooth and shiny.  I'm a little afraid of the cleaning prospects. Just see how dusty it is now!  However, since no one else ever does laundry but me, once the construction is over and the floor is carpeted, it will probably stay a lot cleaner.


The main floor powder room and mud room both got a really cool grey 12x24 inch tile with a glossy stripe pattern in it.   It has a little bit of brown tones in the stripes, which will go well with the brown hardwood floors just outside the mudroom and powder room.


And then on a whim we decided to tile the entire back wall of the powder room with a gorgeous lantern patterned tile.   It will be so amazing when the lights are in and the shiny red vanity is installed!


The only room remaining untouched is the basement bath.  Big Daddy chose a wood-look tile called Eclipse Olive. It looks like this...

And the general look of the room we're trying to achieve is this.  Very spa-like.  (Only minus all the fancy shower heads and steam thingies.  This is a GUEST bath not an actual spa!  Sheesh.)


Unfortunately, we've fun out of money to finish this bathroom so it'll have to wait until some future date when money shows up again.  Probably 2019.


The fireplaces, also, will have to wait. They had these horrible faux marble and faux granite surrounds, both mauve!  So those got ripped out and will be replaced with a lovely herringbone pattern, maybe like this (but probably not limestone = EXPENSIVE!)  Someday....


Of course, the kitchen backspash will be tile too.  I'm pretty set on a penny tile or an oval penny tile.  But since the kitchen doesn't exist yet (supposedly its going in on Thursday), I just haven't gotten my brain that far.  I'll update on that later.


Anyway, that, my friends, is how tile came back into my life.  I will report back later on whether the measures we took to make my life less plagued by grout were successful or not!