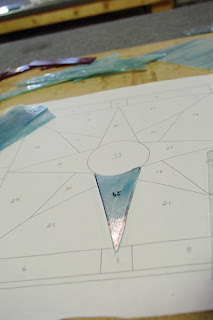
Step 1: Get out your board where you laid out your design and glass pieces. Try to remember which pieces of glass you had intended to go where.
Step 2: Find all the instruments you'll need. You know, that cutting thingy, and that plier thingy, and that other plier thingy, and that brush thingy. (All technical terms I memorized from last week.) Oh, and a Sharpie.
Step 4: Start cutting the curve at the top.
Step 5: Use the smaller plier thingy to break off the curved piece.
Step 6: Repeat steps 3, 4 & 5 since the first attempt ended in little tiny shards.
Step 7: Repeat steps 3, 4 & 5 since the second attempt ended in a snapped off tip.
Step 8: Repeat steps 3, 4 & 5 since the third attempt wouldn't come off at all.
Step 9: Go find some new glass since you used up all the pieces you had.
Step 10: Start cutting (again).
Step 11: Go find the teacher to show you how to do it since you just ruined another piece.
Step 12: Success! You finally got the curved piece off! Now try the straight cuts down the sides.
(These are not my hands, by the way. But seeing as how I couldn't photograph my own hands, thank you to whoever posted this picture on Google images!)
Step 14: Use those bigger plier thingies to snap off the excess glass.
Step 16. It doesn't fit. It's too long. So go grind it down to size on the glass grinding thingy.
Step 18: Honestly! This is way harder than it looks! But if you finally managed to grind down your 10th attempt properly, good for you. Now do it all over again with the next 32 sections of glass.
So that pretty much sums up my evening. A lot of cutting and a recutting until I got the technique down. A LOT of close up grinding down of edges, hunched over the grinder. Then walking back and forth to my design to see if the pieces fit. Then cleaning off the marker and starting the next piece. But I feel like I finally got a good rhythm, and next week will go way faster.
Here's how pathetically far I got this week:


No comments:
Post a Comment